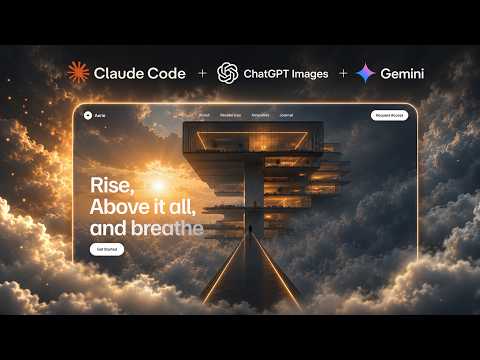
The effect here is the one people screenshot: you scroll, and the page zooms you through a doorway into what is behind it, with clouds drifting past at their own speed.
There is no 3D engine involved. It is three flat images arranged in space and moved at different rates, which is the oldest trick in animation and still the most convincing one on the web. Understanding that is most of the lesson — once the depth comes from layers rather than geometry, you can build this kind of scene from any set of images.
ChatGPT generates the layers, Claude Code assembles them into a Next.js site and wires up the scroll.
01Find a scene with obvious depth
On Pinterest, look for compositions with a clear foreground, middle and background. An image that is already flat cannot be layered convincingly afterwards, however good it is.
A doorway, an arch, a gap between two objects — anything with a clear "through" in it — gives you somewhere for the scroll to travel.
From the library
Get the prompt for this build
The designs used in this lesson live in the library. Open one to copy the prompt behind it.
02Generate the hero image
Get the overall look right first as a single composed image. This one is never used in the build — it is the reference every layer will be matched against, so the three separate pieces agree on lighting and palette.
Spend the iterations here. Regenerating a reference is cheap; regenerating three matched layers is not.
03Break the scene into three layers
Generate the background, the portal door and the clouds as three separate images, each on its own. This is the step the effect depends on.
Depth comes from moving them at different rates as the page scrolls, which is only possible if they are separate files. A single composed image can be scaled, but it cannot be moved through.
- Background: the environment, full-bleed
- Door: the portal alone, on transparency
- Clouds: foreground elements, on transparency
04Set up the Next.js project
Start a fresh Next.js project in Claude Code and describe the structure before any of the effects: three stacked layers, correctly ordered, filling the viewport.
Confirm the stack renders correctly and the ordering is right before asking for a single frame of animation. Debugging motion on top of a broken stack is twice the work.
05Add the images and check the composite
Drop the three layers in and look at the static composite. Edges, scale and alignment all get fixed here, while nothing is moving.
If the seams are visible standing still, they will be much more visible in motion.
06Refine with reference images until it matches
Now the same loop as the physics build: screenshot what you have, put it next to the reference, and name the differences. Scale, position, how much of the door is visible at rest.
Each pass is small. The temptation to ask for a redesign is what loses the parts that were already right.
- Compare against the reference, not against a memory of it
- One correction per message
07Wire the zoom to the scroll
Ask for the scroll to drive a zoom through the portal: the door scaling up and past the viewer, the background approaching more slowly, the clouds moving fastest of all because they are nearest.
Then tune the rates. Getting the relative speeds right is what makes it read as depth rather than as three images scaling at once — and it is worth asking for the parameters to be exposed so you can tune them without a rebuild.
- Nearest layer moves most, furthest moves least
- Tune the relative rates, not each one in isolation
- Check it on a trackpad and a mouse wheel — they scroll very differently
What you end up with
A scroll-driven 3D scene with real depth, from three flat images and no 3D library.
The technique outlasts the specific build: separate your art into layers by distance, move them at different rates, and depth follows. Portals, windows, landscapes, product shots — the same three steps.